To begin accepting payments with SquareSync for WooCommerce, you’ll need to configure some settings within both your Square Developer Dashboard and your WooCommerce site. Follow these steps to set up your payment options and start processing transactions smoothly.
Step 1: Get Your Application ID #
- Log in to your Square Developer Dashboard.
- Select the application you created for WooCommerce Sync.
- Copy the Production Application ID from the application settings.
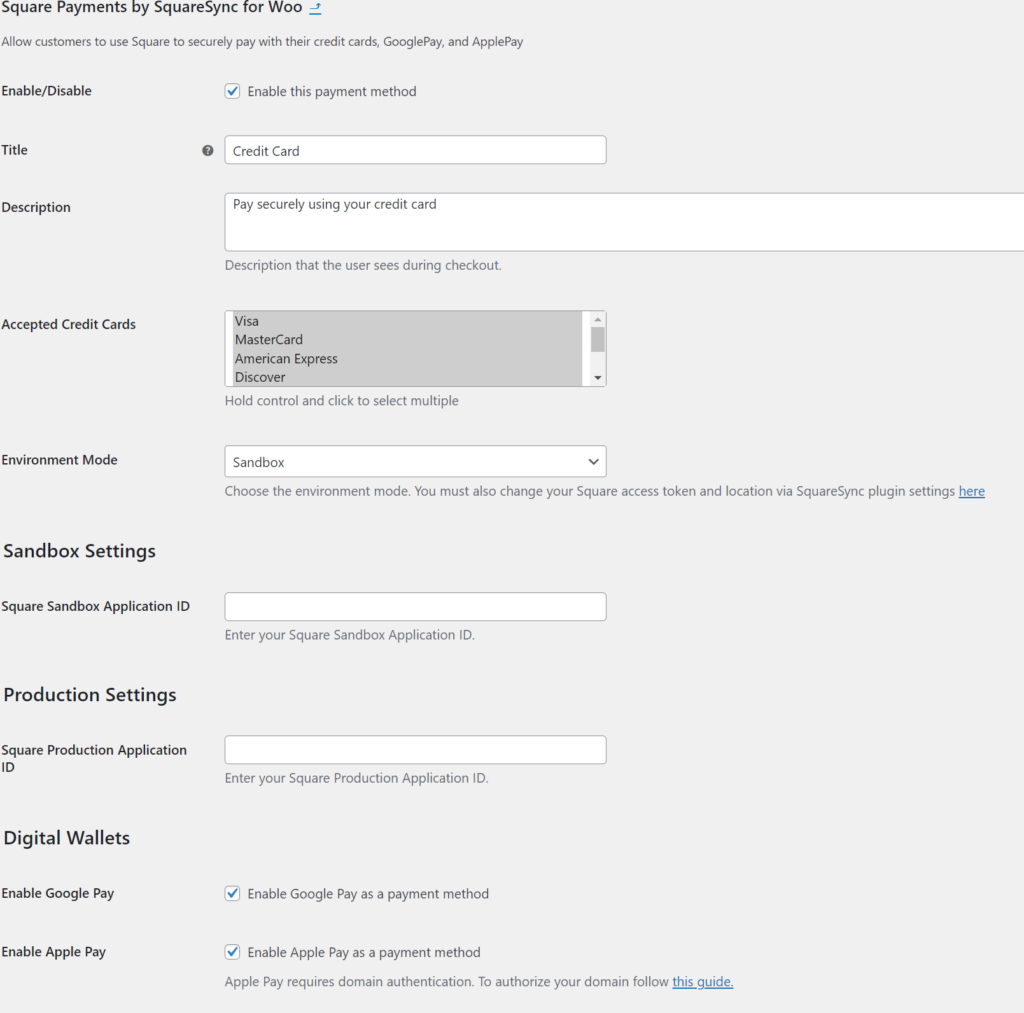
- Head back to your WordPress dashboard and navigate to SquareWooSync > Settings > Payments.
- Paste the Application ID into the Payments Application ID field.

Step 2: Configure Payment Options #
- On the Payments settings page, you can choose which credit cards to accept.
- Set the Payment Title to customize how the payment option appears to customers during checkout.
- Select the Environment Mode (Sandbox or Production) based on whether you are testing or ready to accept live payments.
Step 3: Set Your Access Token and Location #
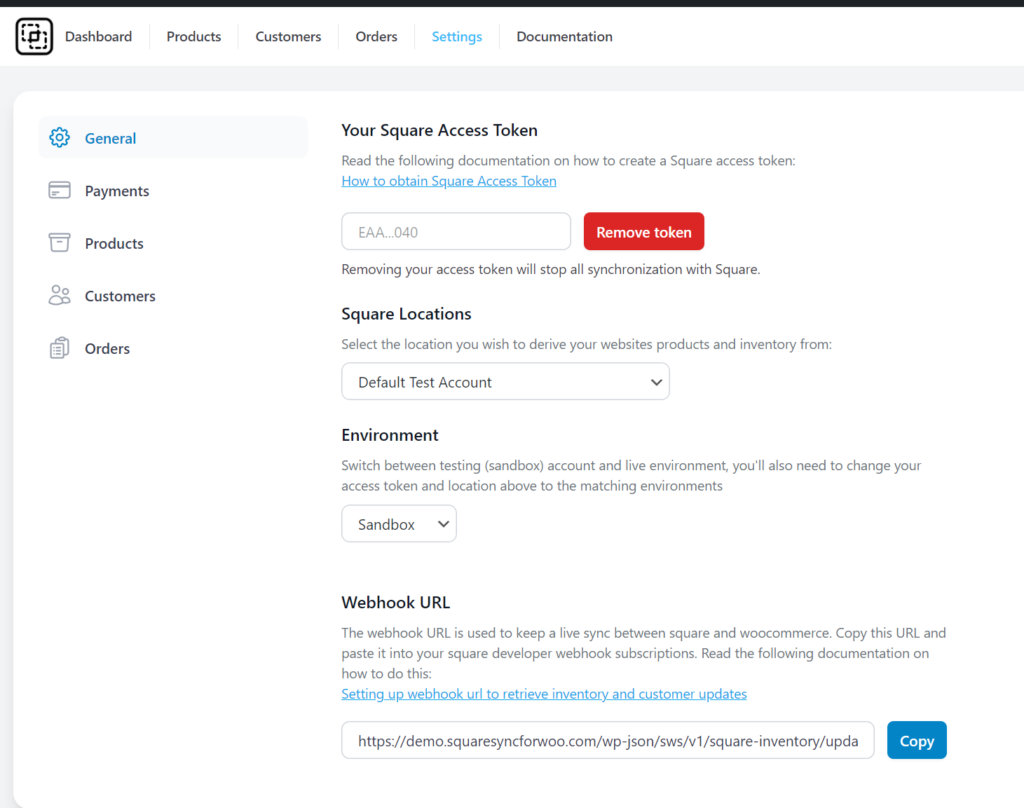
- Ensure your Access Token is configured by navigating to SquareWooSync > Settings > General.
- Select the appropriate Location for your Square account. This location setting is crucial for managing inventory and payments.

You’re All Set! #
Once you have completed these steps, your SquareSync integration is ready to start accepting payments, allowing you to securely process transactions with a variety of credit cards and wallet options.


