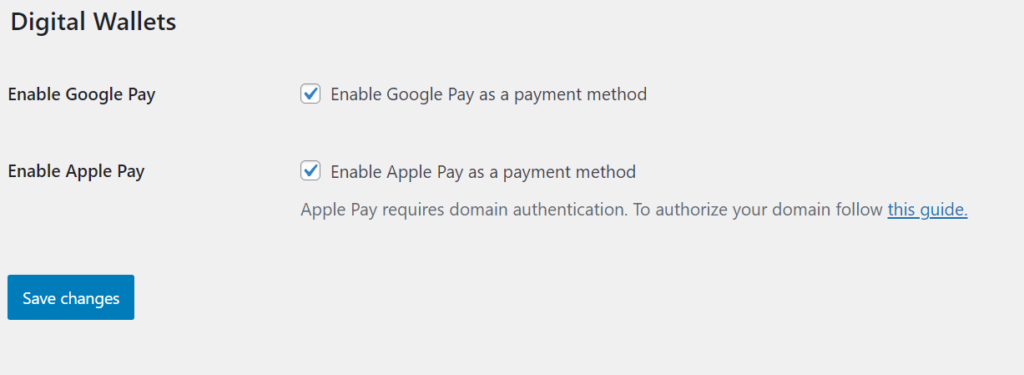
SquareSync for WooCommerce allows you to accept payments through Google Pay and Apple Pay, providing a seamless experience for your customers. Follow the steps below to enable these payment options.
Setting Up Google Pay #
- Log in to your WordPress dashboard.
- Navigate to SquareWooSync > Settings > Payments.
- Click the Enable Google Pay checkbox to activate Google Pay for your store.
That’s it! Google Pay is now enabled and ready for use.

Setting Up Apple Pay #
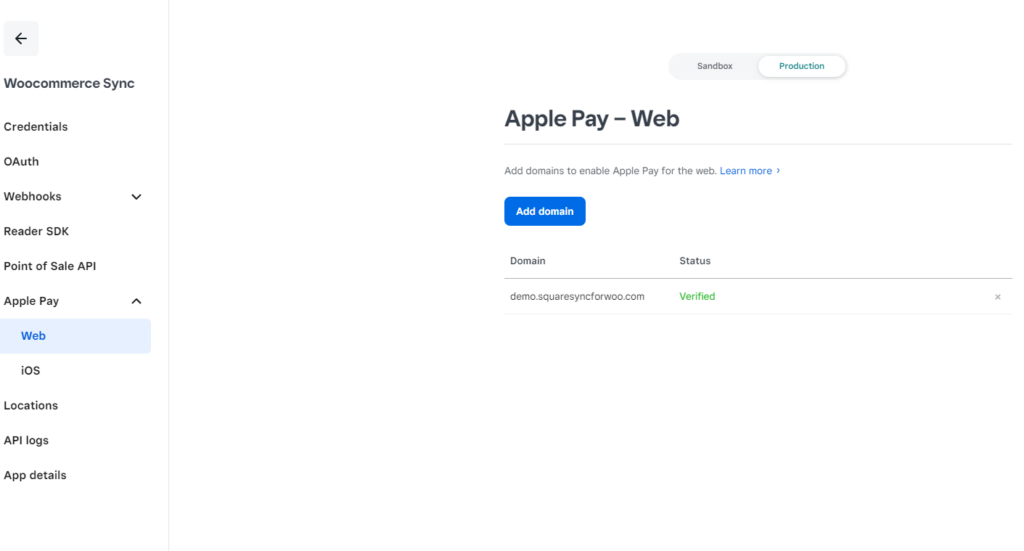
- Log in to your Square Developer Dashboard.
- Open the application you created for WooCommerce Sync.
- Click on the Apple Pay button on the left-hand menu.
- Follow the steps provided by Square to verify your domain:
- Download the verification file from the Square Developer Dashboard.
- Upload the file to your server as instructed by Square.
Once the domain is verified, Apple Pay will be successfully configured for use in your store.

Now that both Google Pay and Apple Pay are set up, your customers can enjoy fast and convenient payment options during checkout.


