Integrating SquareSync with WooCommerce can streamline your business operations by synchronizing your inventory, sales, and customer data. This guide will walk you through the step-by-step process of installing the SquareSync for WooCommerce plugin on your WordPress site.
Step 1: Download the Plugin #
- Purchase and download SquareSync for Woo Pro from your account under the Downloads tab. Log in here.
- You will receive a
.zipfile of the plugin; do not unzip this file.
Step 2: Install the Plugin on Your WordPress Site #
- Log in to your WordPress dashboard.
- Navigate to Plugins > Add New.
- Click the Upload Plugin button at the top of the page.
- Choose the
.zipfile you downloaded earlier, then click Install Now. - After the installation is complete, click Activate Plugin.
Step 3: Activate Your License #
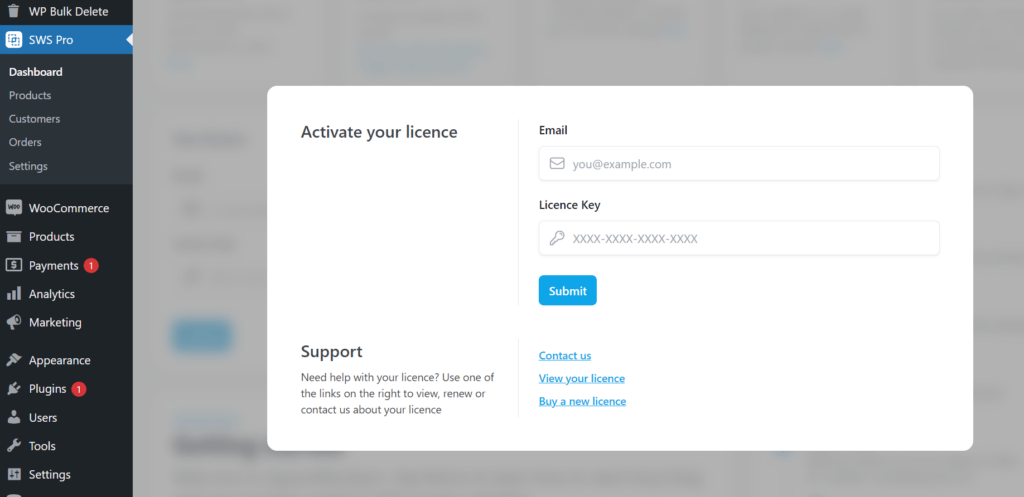
- Upon activation, navigate to the plugin page accessible via the newly created SWS Pro menu item.
- You will be prompted to enter your license key and email in the provided fields. This key was provided to you upon purchase of the plugin.
- Click Activate License. You will receive a confirmation once your license is verified and activated. This step is crucial for receiving updates and support.
With the plugin activated and the license verified, you’re ready to start synchronizing your inventory, sales, and customer data, enjoying the benefits of unified inventory management, streamlined sales reporting, and enhanced customer data synchronization.


