Importing your Square products into WooCommerce with SquareSync is a straightforward process. This guide will take you through each step to ensure all your products are seamlessly transferred, keeping your online store up-to-date and synchronized with your Square account.

Step 1: View All Square Products #
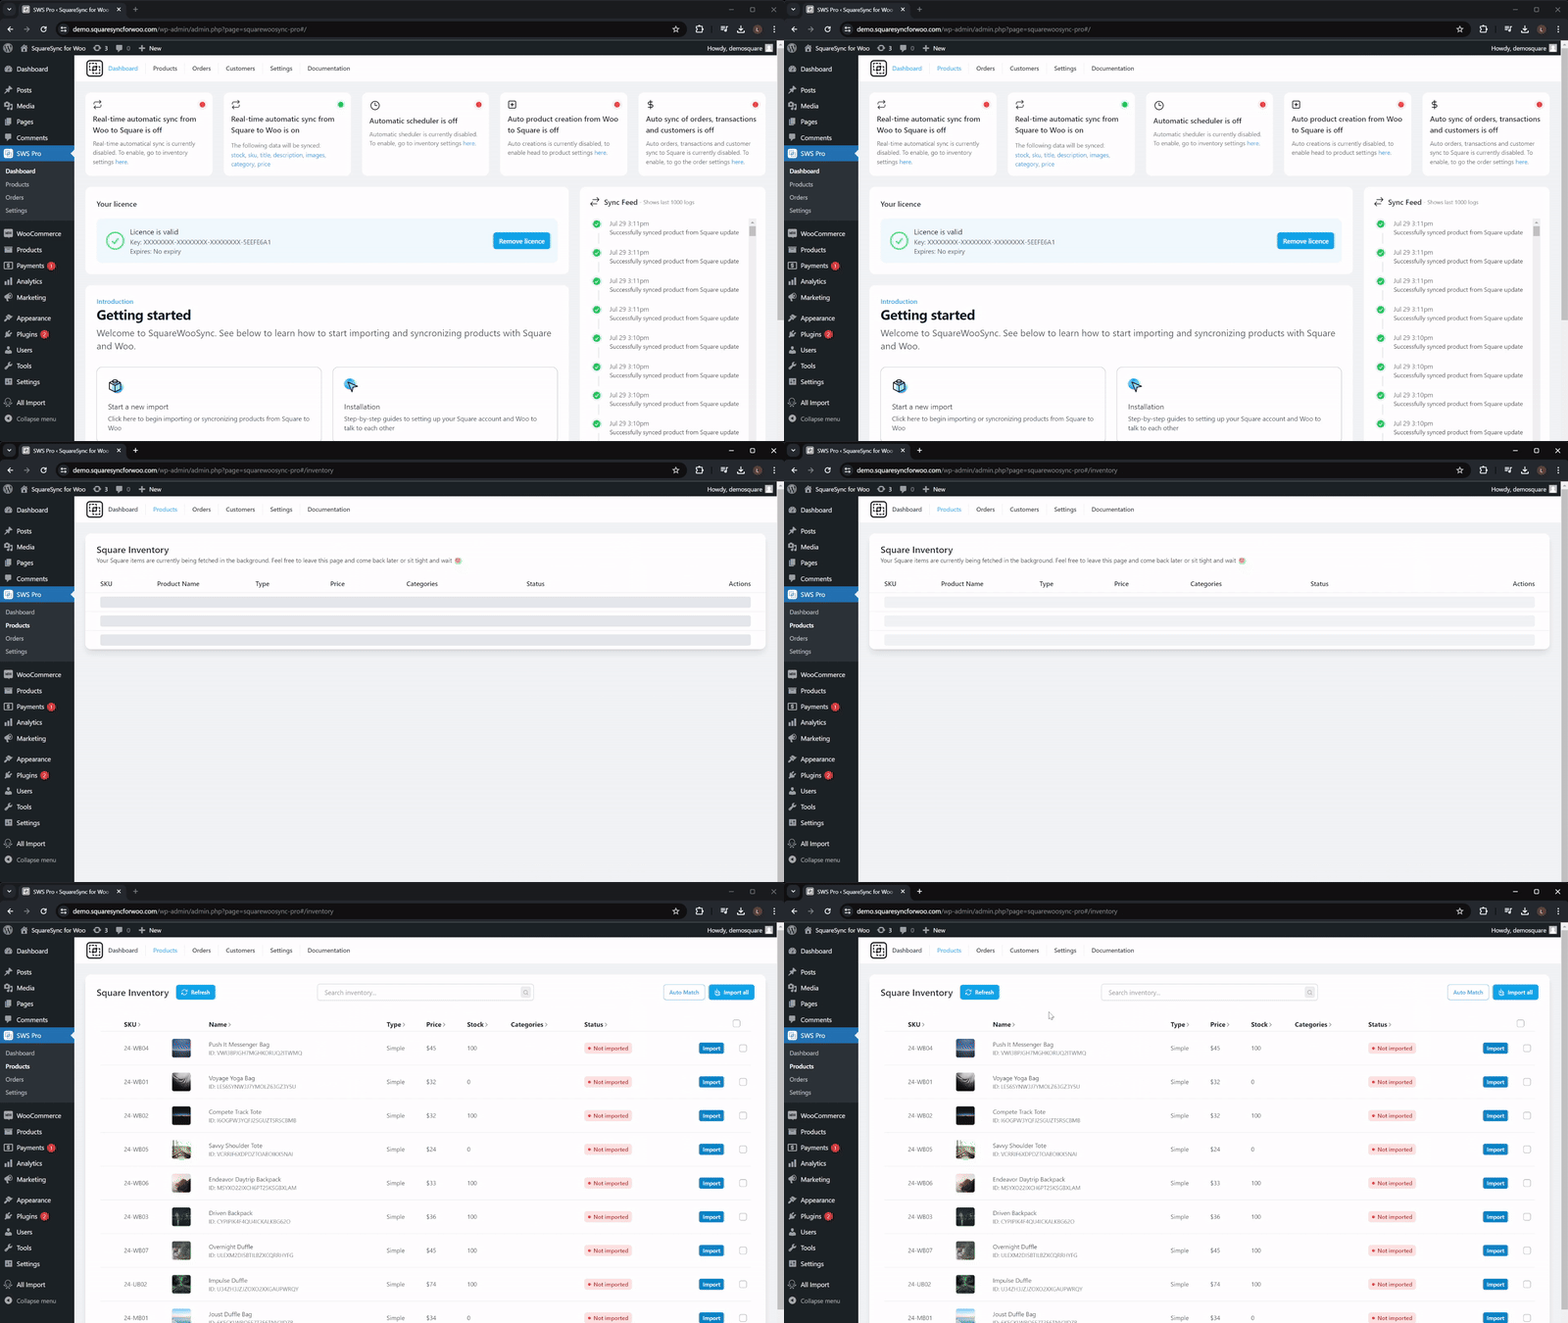
To begin importing your Square products, navigate to SquareSync for Woo > Products page. This page displays all available products in your Square account, providing a comprehensive overview of your inventory. Here, you can decide whether to import all products or just a select few. The user-friendly interface allows you to easily browse through your products and make informed decisions on which items to sync.
Step 2: Select Products to Import #
Select the products you wish to import by using the checkboxes on the right side of the product table. If you want to import all products at once, you can use the checkbox at the top of the table header for bulk selection. This bulk feature is particularly useful if you have a larger inventory. After making your selection, click the Import All button. This will present you with various import options, allowing you to customize the data transfer to meet your specific needs.

Step 3: Customize Your Import Data #
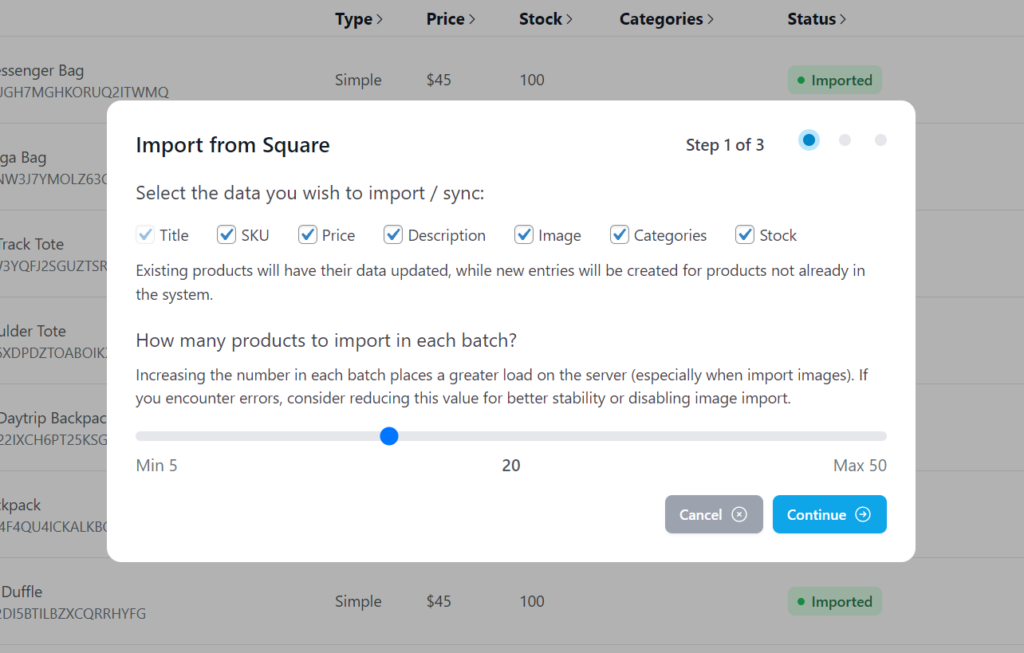
During this step, you can specify which data attributes to import. Available options include:
- Title: The name of the product.
- SKU: The stock-keeping unit for inventory management.
- Price: The cost of the product to ensure consistent pricing across platforms.
- Description: Detailed information about the product to improve its online listing.
- Image: A visual representation of the product, essential for attracting customers.
- Categories: Organizational tags to help in sorting and managing products.
- Stock: Current inventory levels to maintain accurate stock records.
This level of customization ensures that your imported data is accurate, relevant, and aligned with your e-commerce strategy.
Step 4: Adjust Batch Settings #
The Batch Setting feature helps improve the reliability of the import process. If your server is slower, consider lowering the number of products to import per batch to prevent timeouts. Adjusting this setting will help manage server load and ensure that the import process runs smoothly, resulting in a successful data transfer.
Step 5: Run the Import #
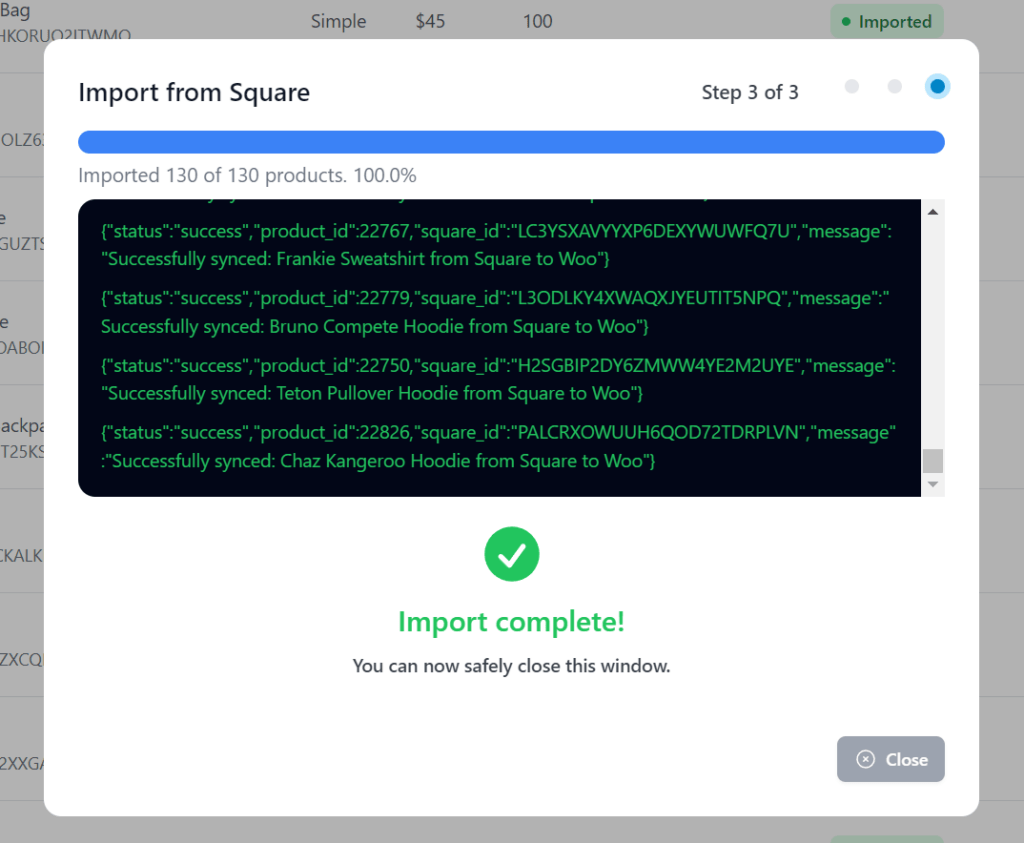
Once you have configured your settings and selected the desired data attributes, it is time to run the import. Click the Run Import button to start the process. Make sure to stay on the page during the import; navigating away will cancel the operation. During the import, you will see real-time updates on the progress, including any errors or issues. Once complete, the results will be displayed, confirming the successful transfer of your products into WooCommerce.

Your products are now available in your WooCommerce store, fully synchronized with your Square account, ensuring inventory accuracy and consistency across your sales channels.


